🏗️ Creating properties
Open property creation with /createproperty. Admins and real estate jobs with the creation permission can use it. The flow has up to six steps: Type, Placement, Interior, Features, Listing, and Confirm.
Type
Pick one of four property types.
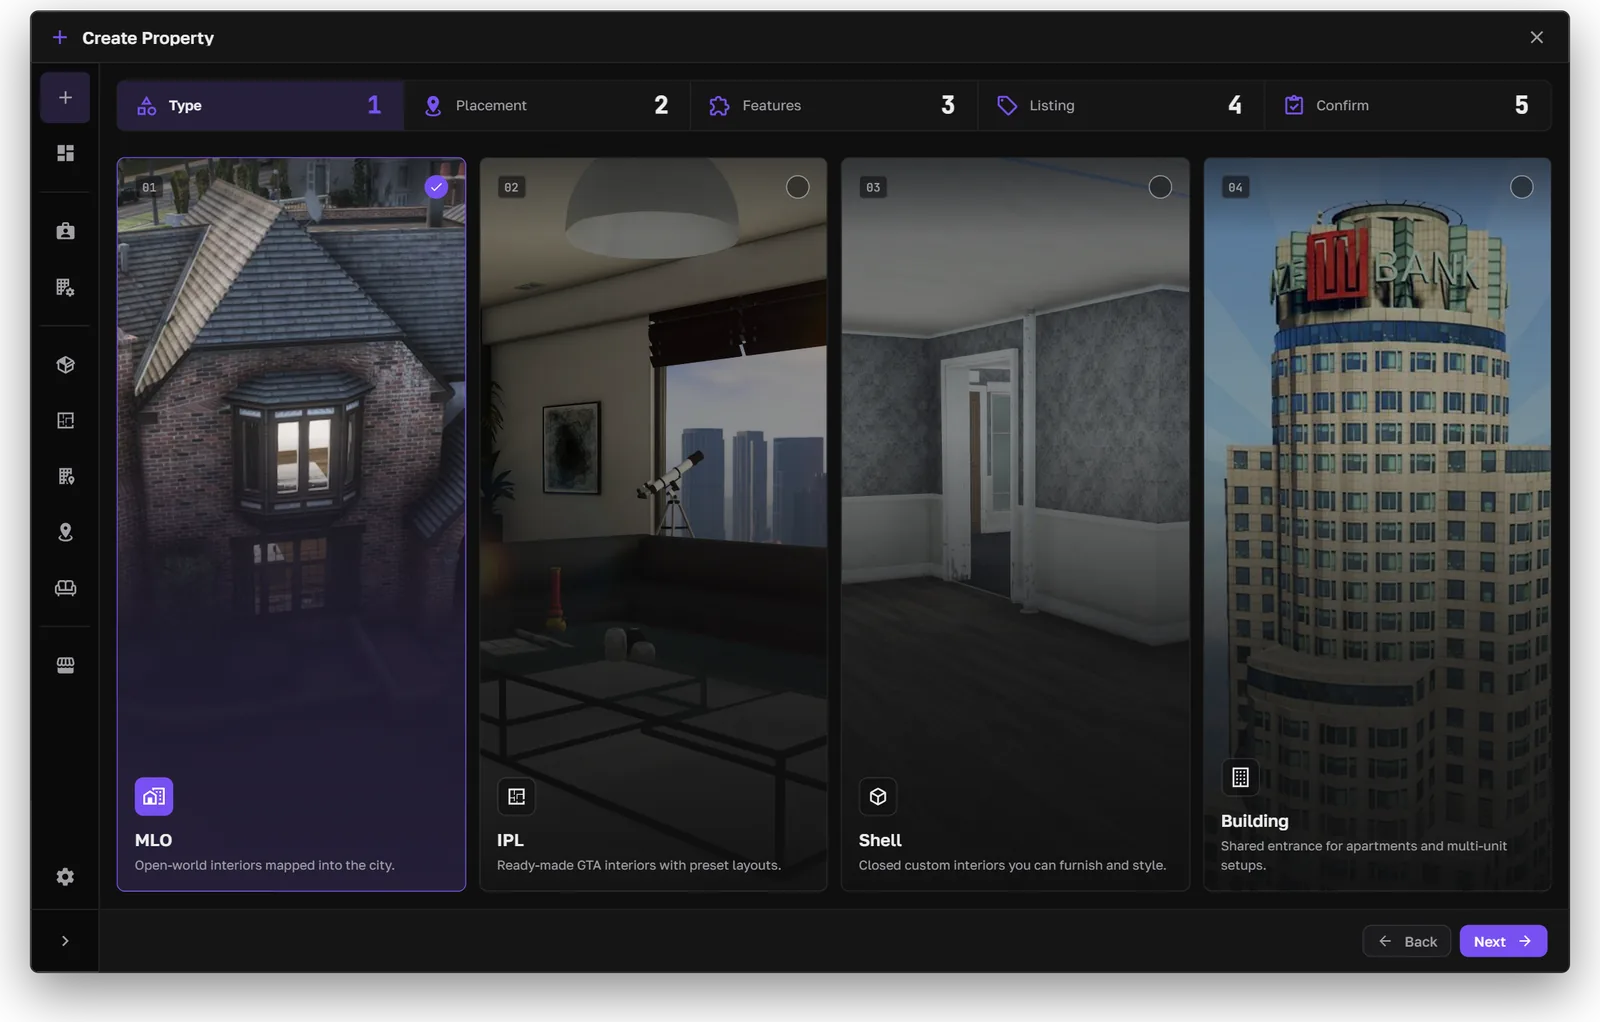
Choosing the property type
You can create several properties in one go. The unit price and total are shown before you confirm.
Placement
Set the entrance and the points the property needs. For MLOs, draw the yard and any inside zones. Points outside the yard, or outdoor points inside an inside zone, are blocked with an on-screen error.
The placement tools (freecam limits and point selection) are set in Settings → Creation → Placement tools.
Interior
For shells and IPLs, choose the interior. Each card shows its stash size and how many points it has.
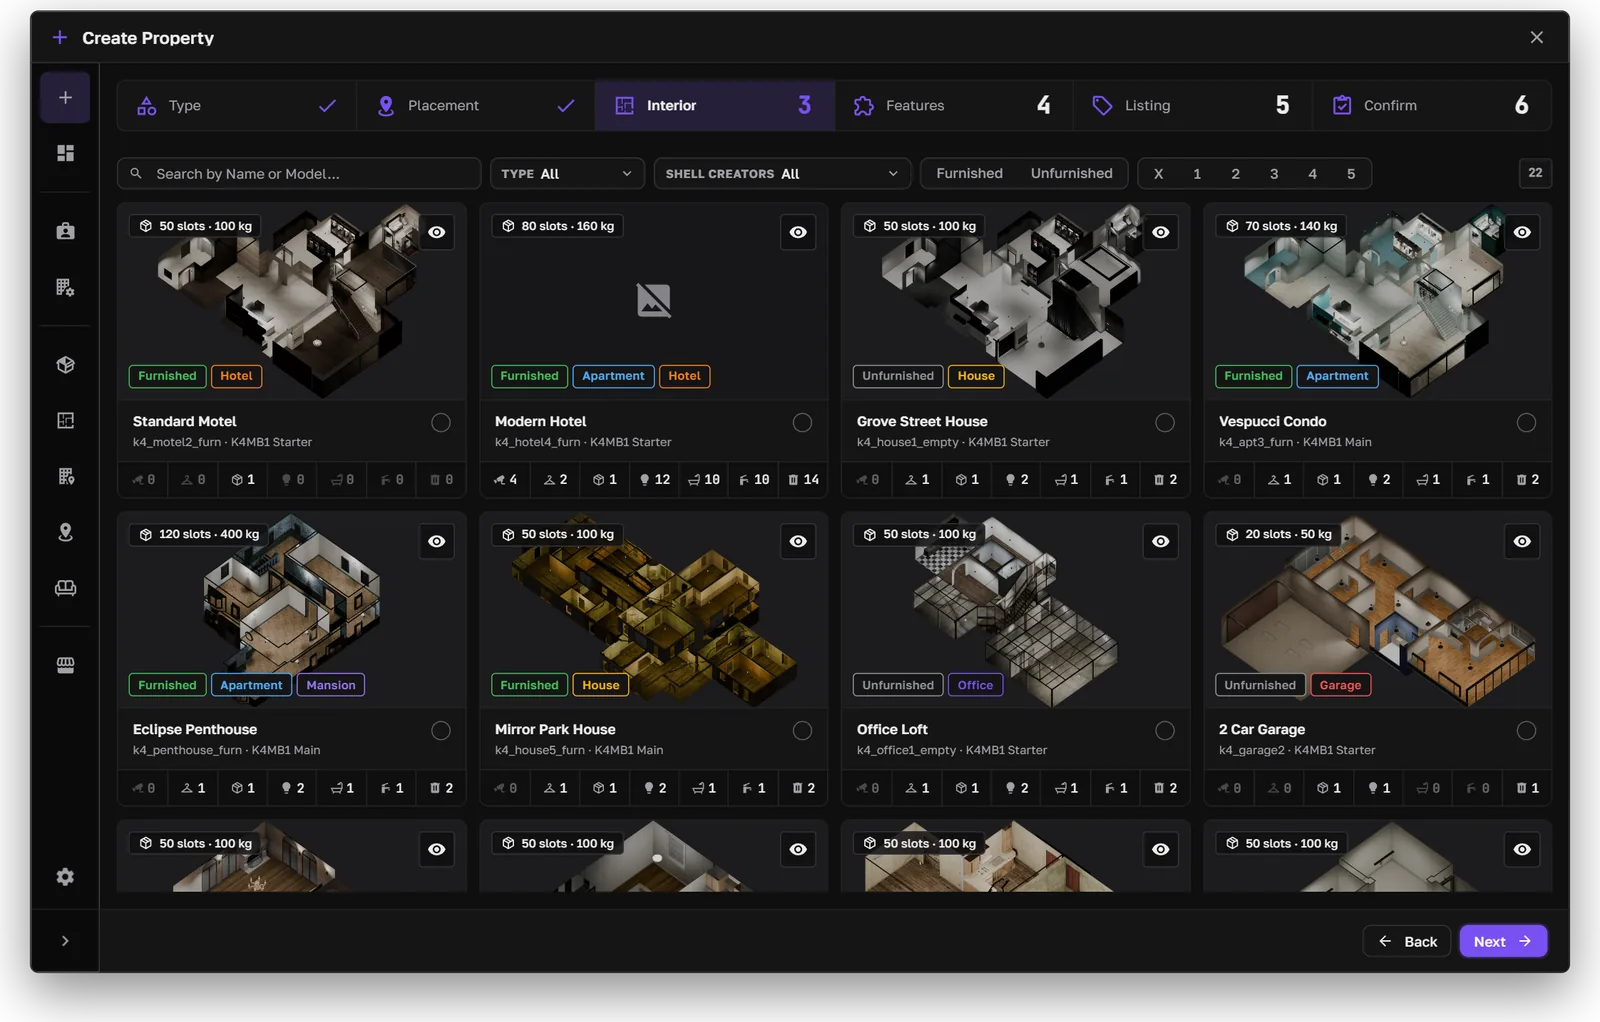
Picking an interior
- Search by name or model.
- Filter by type, shell creator, furnished or unfurnished, and tier.
- Preview any interior before you choose it.
Shells come from the installed shell packs and from the Shell Creator.
Features
Add interactable points: stash, wardrobe, garage, and others. Their positions come from the interior or from your placement.
Listing
Write how the property appears on the marketplace.
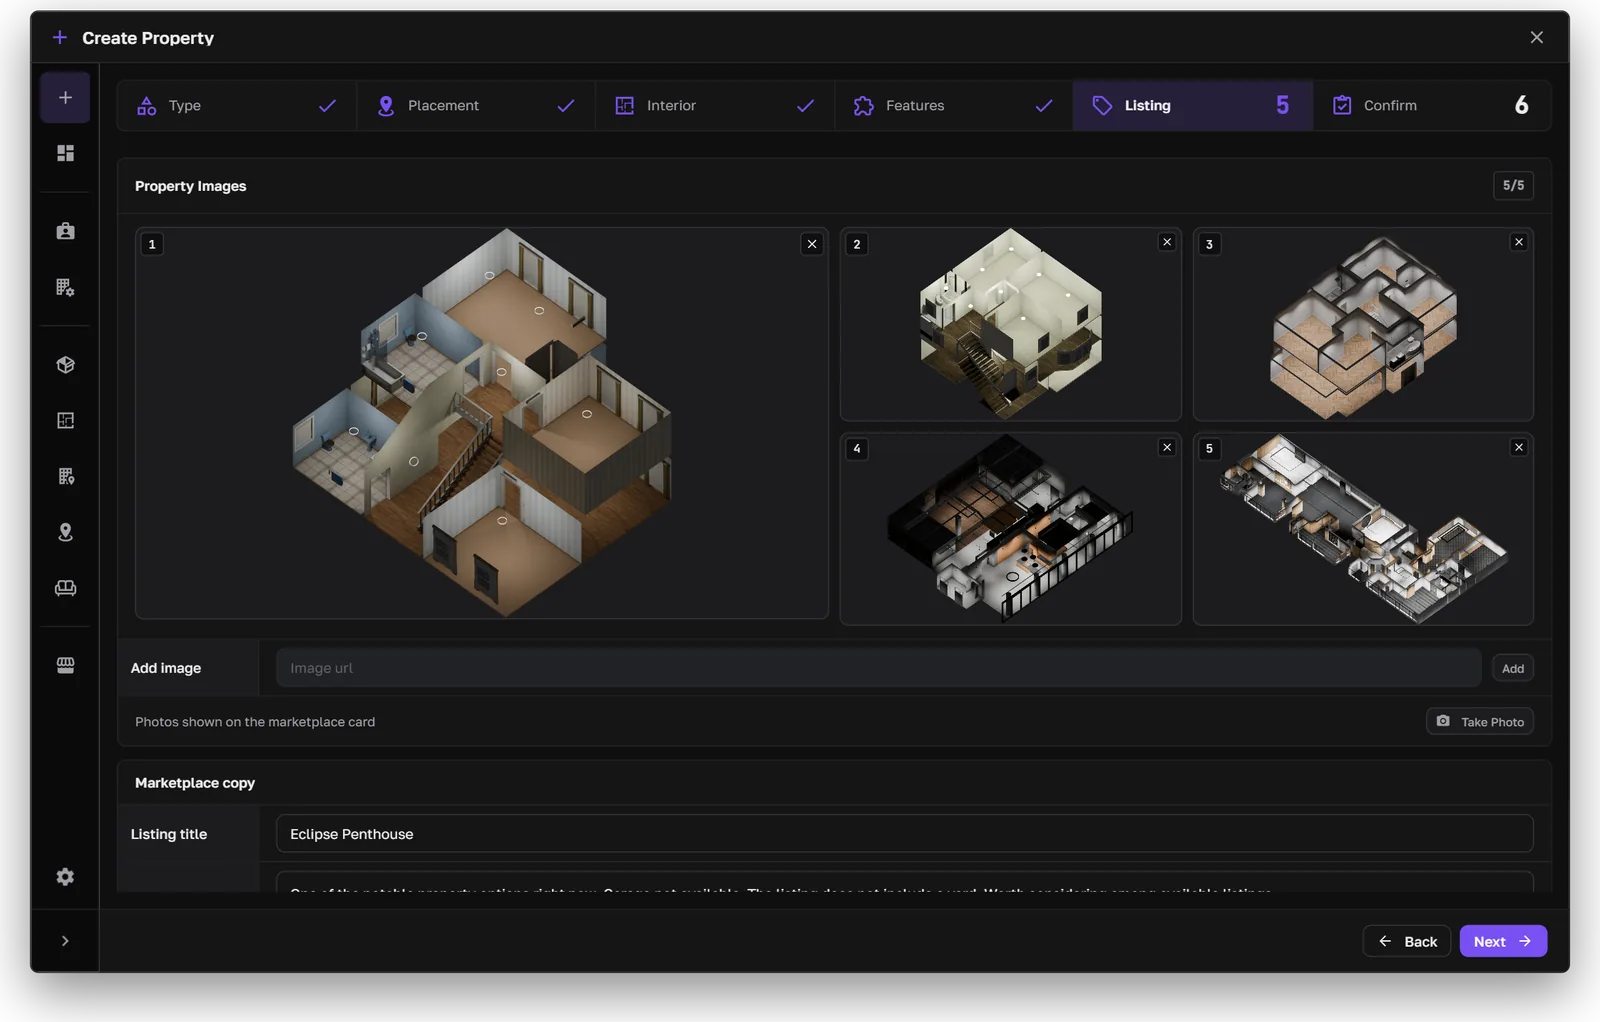
The listing step
- Photos: take them in-game with Take Photo, or add an image URL. Drag them into the order buyers see.
- Title and description: write your own, or press Auto Generate.
- For sale / for rent: enable either or both, each with its own price.
- Furniture limits: override how much furniture fits inside and outside this property.
Confirm
Check everything and the creation cost, then create the property.
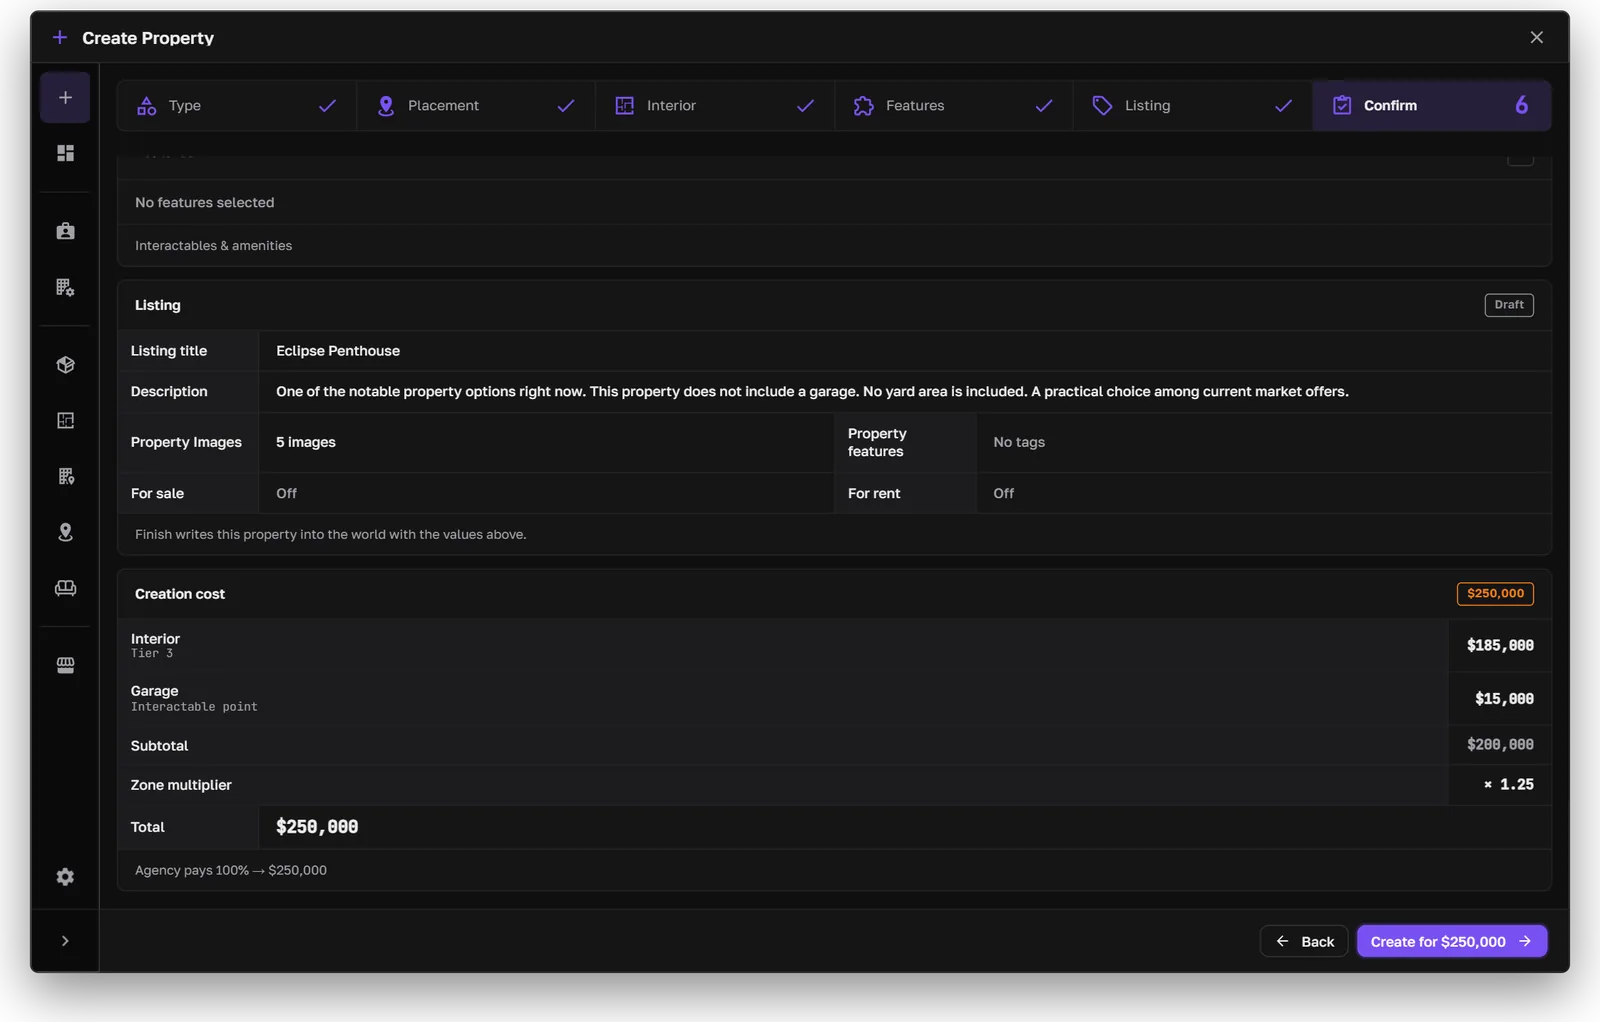
The creation cost: interior, garage, zone multiplier, and total
The cost depends on the interior's tier, any garage, and the map zone multiplier. Whether creating a property costs money, and who pays, is set in Settings → Creation and Settings → Contracts & Agency.